Your book is in Word. You may upload the Word file to KDP as it is, or give it to a program that sets the book. Either way the first steps are the same: mark the chapters, the title and the scene breaks, so that software can tell them apart. This guide gives each step with Word's menus, then the page settings for laying out the pages in Word yourself.
The short answer
Put chapter titles in Heading 1 and the book's title in Title. Mark
scene breaks with * * *, let the paragraph settings do the
indents, accept every tracked change and save the file as a .docx. If you
also lay out the pages in Word, set the page size to your trim size, use
mirror margins, start chapters with odd-page breaks and check the PDF
before you upload.
1. Mark chapters with Heading 1
Select a chapter title and choose Heading 1 in the Styles gallery on the Home tab. Use Heading 2 for sections inside a chapter. Headings set this way appear in the Navigation pane, which opens from the View tab, so you can check at a glance that every chapter is marked. A title that's only bold and centered looks like a heading, but nothing in the file says it is one.
If you use Torcul: we also read a bold, centered line as a heading from how it looks, and show you the reason for each heading, so you can correct it.
2. Put the title in Word's Title style
Word's style gallery has a Title and a Subtitle style. Type the book's title in Title, the subtitle in Subtitle, and the author's name on the line under them, after “by”.
If you use Torcul: we take the line in Title as the book's name and the line under it as the author. Word also saves an author's name in the file, usually the name of the account it was written on. Where the two differ, we use the name in the text and tell you so.
3. Mark scene breaks with a symbol
Put three asterisks, * * *, on a line of their own between
two scenes. A single #, centered on its own line, does the
same. Don't leave blank lines instead. A book sets its own spacing, and a
blank line that falls at the bottom of a page disappears, so the two
scenes run together.
If you use Torcul: we drop empty paragraphs, and read
* * *, ***, a centered # and
⁂ as scene breaks.
4. Let the paragraphs indent themselves
Don't indent first lines with Tab or spaces, and don't add empty lines between paragraphs. Microsoft's own advice is to set the space between paragraphs in the paragraph settings instead. Indents and spacing set there stay even throughout the book; typed tabs and spaces don't.
If you use Torcul: we remove tabs and spaces at the start of a paragraph and set the indents ourselves. A line break typed inside a paragraph with Shift+Enter becomes a space, because the book breaks its own lines.
5. Use Word's own footnotes
Insert each note with References → Insert Footnote, rather than typing a small raised number by hand. A real footnote stays linked to its place in the text, so it moves with the text when the pages change.
6. Pictures, charts and text boxes
Insert each picture on a line of its own. For print it needs at least 300 DPI at the width it's printed, or it looks soft on paper. Charts, SmartArt, drawn shapes and text boxes sit on top of the page rather than in the text, so a program that sets the book may leave them out. To keep a chart, right-click it, choose Save as Picture and insert that picture in its place.
Write a description of each picture in its alt text (right-click the picture, then View Alt Text). It goes into the ebook, where screen readers read it out.
If you use Torcul: we warn about any picture below 300 DPI and give its printed resolution on the last screen. Charts, SmartArt, drawn shapes, text boxes and pictures inside tables are left out, and we tell you how many.
7. Accept the tracked changes
On the Review tab, open the Accept list and choose Accept All Changes, or reject the changes you don't want. Hiding them with No Markup doesn't remove them: they show again the next time the file is opened.
If you use Torcul: we read changes left in the file as if they were accepted, and tell you how many there were. Comments aren't set in the book.
8. Leave the contents list to the book
If a program will set your book, leave the contents list to it. A contents list made in Word shows Word's page numbers, not the printed book's, and one typed by hand can't update at all, so delete it.
If you use Torcul: we replace a Word contents list with one that shows the printed pages, and tell you so.
9. Save it as a .docx
Save the file as a Word Document (.docx). KDP accepts one for a paperback without bleed and converts it to PDF itself. A PDF you export yourself, though, is exactly what gets printed, so you can check it before you upload.
If you lay out the pages in Word
These are the settings a printed book needs, with the menu names of Word for Windows. Word for Mac has the same settings, some of them under other menus.
- Page size. Set the paper size to the trim size, for example 6 × 9 inches. KDP asks for single pages, not spreads, so leave Word's Book fold alone: it puts two pages on one sheet.
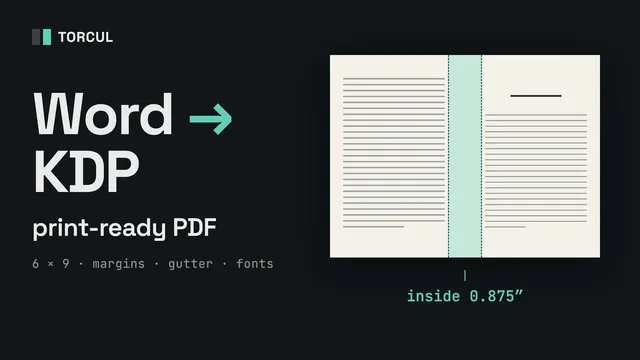
- Mirror margins. Under Layout → Margins → Custom Margins, set Multiple pages to Mirror margins. Make the Inside margin at least KDP's minimum for your final page count, and the others at least 0.25″.
- Chapters on right-hand pages. End each chapter with Layout → Breaks → Odd Page. The next chapter then starts on the next odd-numbered page, even if that leaves a blank page.
- Page numbers and running heads. Double-click the header and select Different Odd & Even Pages, so that left and right pages can differ. A new section carries the header of the one before it, until you turn off Link to Previous in its first header.
- Hyphenation. Layout → Hyphenation → Automatic. Without it, justified lines stretch their spaces to fill the line.
- Widows and orphans. Widow/Orphan control is in the paragraph settings, on the Line and Page Breaks tab, and Microsoft says it's on by default.
- The PDF. Choose File → Save a Copy, then PDF. Under Options, keep Document selected rather than Document showing markup. Then check that every font is embedded and that none is a Lucida font, which KDP refuses: see KDP says “Unsupported fonts are used in your file”.
The inside margin depends on the page count, and the page count changes as the margins change. How KDP gutter margins work explains the loop, and our free PDF checker measures your exported file against KDP's minimums.
Or let us set it
Upload the .docx to Torcul and choose the trim size there, so the page setup in Word doesn't matter. We show you how we read each heading, then set the book with mirrored margins and fit the inside margin to the final page count.
Italic, bold, small capitals, superscript and footnotes carry over. The typeface and size you chose in Word don't, because we set the text in one of our three interior designs. Endnotes become footnotes on the page that refers to them. Chapters start on right-hand pages unless you choose the next page, and words are hyphenated by the rules of the book's own language. You download a print PDF, an EPUB and, if you want one, a cover.
 How to Format a Book in Word for a KDP Paperback (6x9, Margins, Gutter, PDF)
Sources
Microsoft
- Add a heading
- Use the Navigation pane in Word
- Keep text together in Word
- Accept or reject tracked changes in Word
- Create a booklet or book in Word
- Set mirror margins for facing pages
- Insert a section break
- Create different headers or footers for odd and even pages
- Link to Previous
- Control hyphenation
- Use Line and Page Breaks settings in Word
- Save or convert to PDF or XPS in Office desktop apps
KDP
- Paperback Submission Guidelines: what KDP checks in an interior.
- Set Trim Size, Bleed, and Margins: the trim sizes and the minimum margins.
None of this guarantees that KDP will accept a file. Microsoft and KDP change their menus and help pages, so check the date on this one.